
AI Script-to-Video: 5 Steps From Script to Social Ad
AI Script-to-Video: 5 Steps From Script to Social Ad
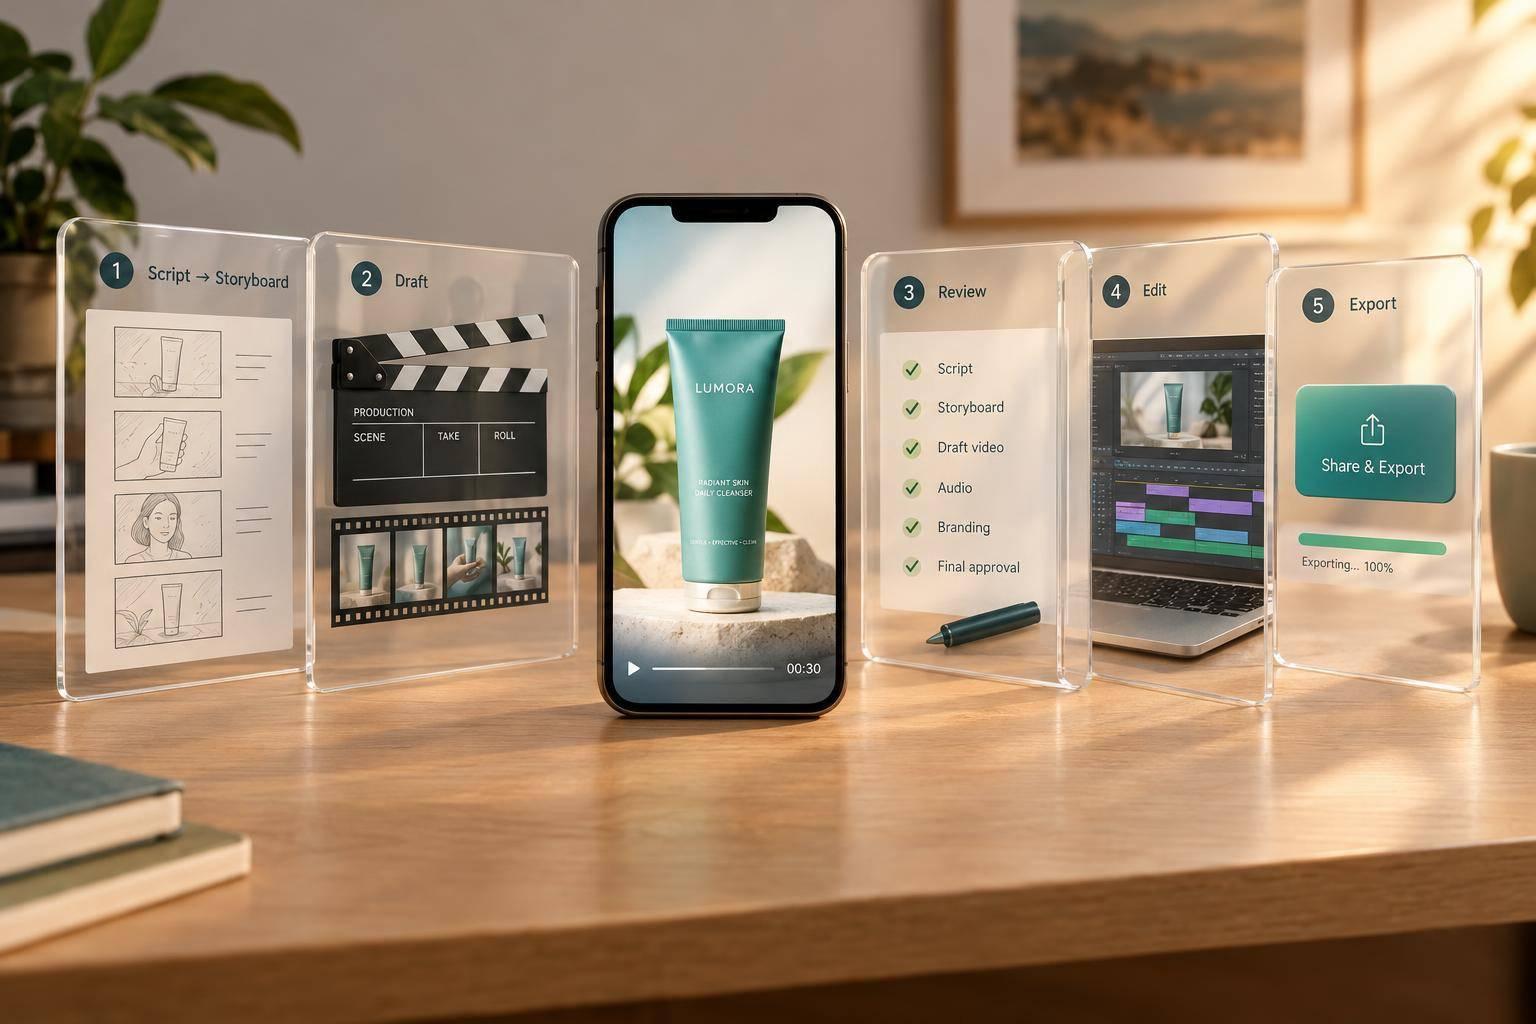
For a 30-second AI video ad, I plan around 75 spoken words - and leave room for pauses. Then I turn the script into scenes, check the draft, and prepare it for each social platform.
Here’s my five-step process:
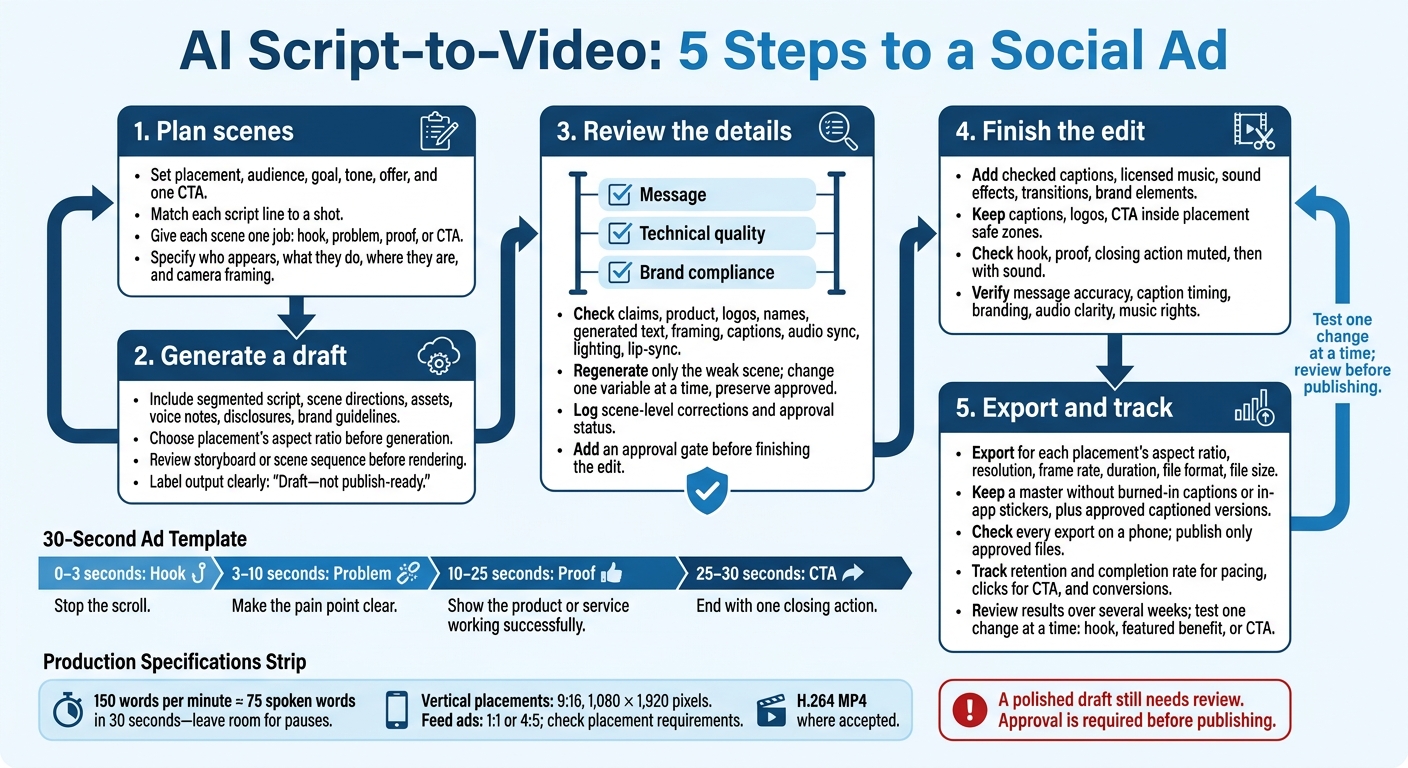
- Plan scenes: Set the audience, offer, and one call to action. Match each script line to a shot.
- Generate a draft: Include scene directions, approved product assets, voice notes, and the placement’s aspect ratio.
- Review the details: Check the message, video quality, and branding. Fix failed scenes without changing approved ones.
- Finish the edit: Add captions and licensed audio. Check the hook, proof, and closing action - with sound and without it.
- Export and track: Check each version on a phone, publish only approved files, and use results to test one change at a time.
My rule: <u>a polished draft still needs review</u>. I keep claims, product details, captions, and approvals in check before publishing.
AI Script-to-Video: 5 Steps to a Social Ad
Step 1: Plan the Scenes
Set the brief before choosing shots: placement, audience, goal, tone, offer, and one call to action (CTA). Placement determines framing; the goal determines the CTA. For TikTok, Reels, and Shorts, plan vertical scenes in 9:16 at 1,080 × 1,920 pixels.
Start a new scene whenever the speaker, setting, or action changes. Give each scene one job: hook, problem, proof, or CTA. Cut anything that doesn't serve those jobs. For a 30-second ad, use the time blocks below to map out all four.
Map Audio, Visuals, and Timing
Write visual directions that spell out who appears, what they do, where they are, and how the camera frames them. Include the style and product details so the generated scene supports the spoken claim.
Use this structure to align audio, visuals, and timing.
Audio Visuals Timing "Stop wasting your weekends scrubbing grease." Close-up of a stained kitchen counter; the camera pans across grime. High-contrast lighting makes the mess visible. 0–3 seconds: Hook. Stop the scroll. "You work hard all week; you shouldn't have to spend your weekend cleaning." An exhausted homeowner leans against the kitchen counter. Use a medium shot in an everyday kitchen setting. 3–10 seconds: Problem. Focus on time spent cleaning. "Our pro cleaners handle the grime so you can relax. Look at that shine!" A professional cleaner wipes a kitchen counter. Start close on the wiping action, then show the clean kitchen with bright lighting. 10–25 seconds: Proof. Hold the shot long enough for viewers to see the result. "Book your first clean today for 20% off. Link in bio!" A clean kitchen background with “20% OFF FIRST CLEAN” text. Keep the call to action visible. 25–30 seconds: CTA. Match the visual to the action.
Check that each line fits its time block.
Use the scene map to generate the first draft.
Step 2: Generate a Video Draft
Once the scene map is locked, turn it into a single generation brief. Include the segmented script, scene directions, approved assets, and exact notes on appearance, wardrobe, action, setting, camera, voice, and delivery. Add required disclosures and brand guidelines so the first render follows the approved direction.
Pair each proof asset with the scene it supports. Keep the voice conversational instead of relying on generic narration settings. At 150 words per minute, a 30-second voiceover allows about 75 words - but leave room for pauses.
Choose the Aspect Ratio and Style
Use 9:16 for vertical placements and 1:1 or 4:5 only for feed ads. Check placement requirements before generation. Keep captions, logos, and the CTA inside safe zones so platform UI elements don’t cover them.
Choose the format first, then match the style to the message. Use an AI avatar for presenter-led delivery, synthetic UGC for a conversational format, or AI-generated B-roll with product-focused visuals to show how something works.
Review the storyboard or scene sequence before rendering. Make sure each visual supports the spoken claim and each proof asset appears in the right scene. Then check that the first render shows the requested action. It’s a draft, not a publish-ready ad, and serves as the starting point for brand review.
Step 3: Review Scenes and Brand Details
Use the approved scene map and assets from Step 2 as your review checklist.
Review the draft in three passes: message, technical quality, and brand compliance. Make sure the opening uses a scroll-stopping visual - not a logo or greeting - and makes the problem clear within 10 seconds.
For the technical review, watch the draft once at normal speed. Then check audio sync, framing, captions, lighting, and lip-sync. Look for image-quality problems, warped objects, shifting characters, and wardrobe changes. Confirm that the product works successfully on screen. An action can look polished and still be wrong.
Regenerate only the weak scene, changing one variable at a time: action, camera angle, lighting, setting, or duration. Leave the other directions unchanged and keep approved scenes intact. Check the revised scene against the same script requirement.
Track Corrections and Approvals
Use a scene-level review log like the one below. For each draft, record what appeared on screen, the exact correction needed, and the approval status. Manually compare the product’s appearance, logos, names, claims, and generated text against approved assets. A polished render doesn’t prove those details are correct.
Log every correction by scene so the next render fixes only the failed moment.
Scene Script requirement Visual result Correction Approval status Opening, 0–3 seconds Bold statement or unusual visual Record what viewers see first Specify the opening change needed Pending message review Problem, 3–10 seconds Specific pain point or frustration Record any script-to-visual mismatch Identify the action or setting to revise Pending correction Demonstration, 10–25 seconds Product shown working successfully Record distortions or incorrect actions Name one variable to change Pending product review CTA, 25–30 seconds Match the approved offer and action Record text and claim checks Replace any unapproved details Pending brand approval
Use Sun Scroller’s brand review controls to log timestamped feedback. Then approve the revised draft before publication.
Step 4: Add Captions, Audio, and Edits
Once the draft is approved, finish the ad with captions, audio, and final edits. Generate captions from the approved narration, then check names, speaker labels, and timing. Keep captions short and within safe zones.
Add licensed music, sound effects, transitions, and brand elements. Make sure the narration stays clear above the music and effects. Trim filler words and pauses with automated trimming and audio-sync tools, then review the cut yourself. Check that the edit still delivers the script’s main promise.
Check the Hook, Offer, and Call to Action
Watch the edit muted, then with sound. The first 3 seconds must stop the scroll, the middle must show proof, and the final 5 seconds must end with one CTA.
Leave room for pauses and the closing action.
Last check: Verify message accuracy, caption timing, branding, audio clarity, and music rights. Confirm that any on-screen review is genuine and approved.
Step 5: Export for Each Placement
Once the edit is approved, export a version for each placement that meets its specs: aspect ratio, resolution, frame rate, duration, file format, and file size. Use H.264 MP4s where accepted. For vertical video, 9:16 at 1,080 × 1,920 pixels is a common starting point.
Keep a master export without burned-in captions or in-app stickers, along with the approved, captioned versions. Check every export on a phone. Make sure captions are readable, key visuals stay inside safe zones, audio is clear, and the first and last frames work.
Publish Approved Videos and Track Results
Publish approved exports across YouTube, TikTok, Instagram, Facebook, X, and LinkedIn using Sun Scroller’s multi-format output, analytics, and approval controls. Keep feedback in one place with timestamped notes, and publish only the approved version.
After publishing, use retention and completion rate to assess pacing, clicks to assess the CTA, and conversions to measure business impact where tracking is available. Review results over several weeks rather than judging performance from one upload.
Use the results to test one change at a time: the hook, the featured benefit, or the CTA. Send each revised version through review before publishing.
Conclusion: Repeat the 5-Step Process
After exporting, use the same workflow for the next script. Batch your scripts rather than starting each video separately.
Save a 30-second template with a hook at 0–3 seconds, the problem at 3–10 seconds, proof at 10–25 seconds, and a CTA at 25–30 seconds. Keep the brand voice and visual style consistent across every draft.
Review each ad in three passes: message, technical quality, and brand compliance. This helps prevent errors from carrying over into the next ad.
To outsource production and turn scripts into approved social ads, use Sun Scroller for monthly AI videos with client approval before publishing.
FAQs
How can I keep AI-generated scenes visually consistent?
Keep lighting, framing, and scene conditions consistent across every clip and revision. This helps prevent the video from looking robotic or disjointed. Document clear brand guardrails in a visual style guide so your team and AI tools have concrete standards to follow.
Before the video goes live, have a human review it to check that the visuals and avatar expressions match your campaign’s tone and brand identity.
When should I use real footage for product proof?
When your script needs to prove your offer’s value, show it in action. Use real footage or a visual demo instead of relying on descriptions alone.
For physical products, show someone using the item successfully. For services, include a brief look at a 5-star review or a before-and-after shot. These visuals give viewers proof and help them trust your offer.
How can I adapt one script for different platforms?
Start with a clean 9:16 vertical master video as your source file. Once it’s approved, tailor the hook, captions, audio, and text overlays to each platform’s pacing and audience expectations: TikTok, Instagram Reels, YouTube Shorts, LinkedIn, and X.
Sun Scroller lets you export that approved video across these platforms, keeping your content consistent while helping it feel native to each channel.