
Branded Content Rules for Instagram Reels
Branded Content Rules for Instagram Reels
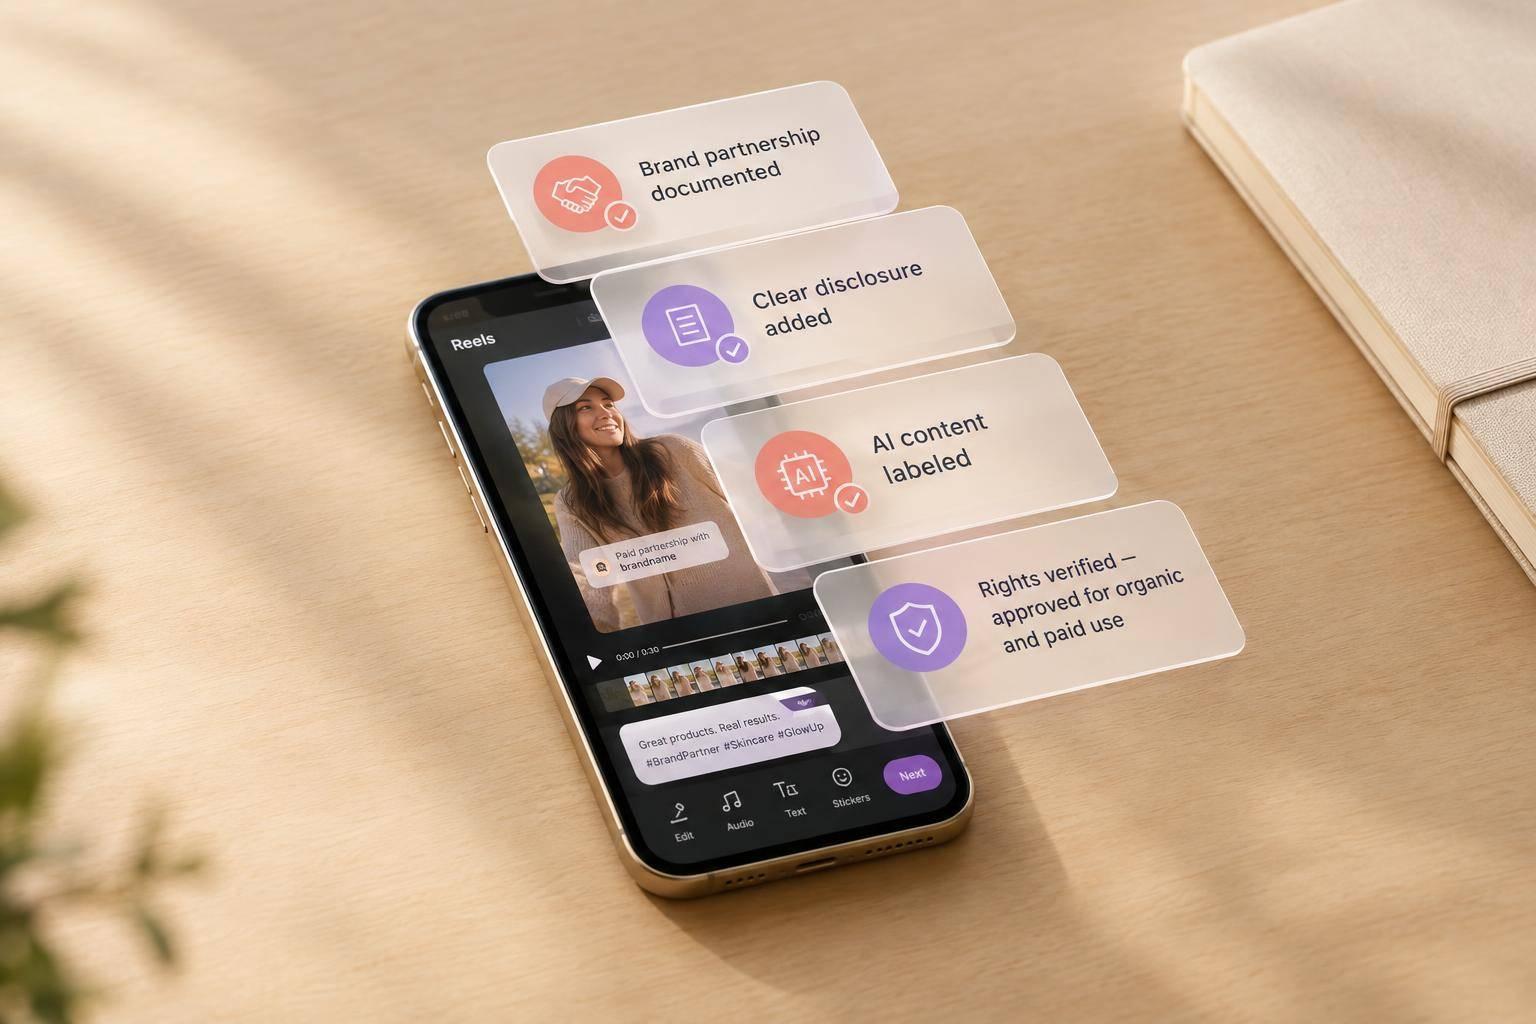
Before I publish a branded Reel, I check four things: the brand relationship, disclosures, usage rights, and final approval. A free product or affiliate commission can require disclosure - even when the post isn’t an ad.
Here’s my checklist:
- Document the relationship. Record payments, gifts, commissions, or employee ties.
- Make the disclosure clear. Check the partner tag and paid partnership label, then review wording such as “Ad” on a phone with sound on and off.
- Check each planned use. Organic posts and paid ads need separate permissions and rights checks. I also verify claims, testimonials, and any required AI labels.
- Approve, save, and verify. Keep the approved file and records together, check the live Reel, and send material changes back for review.
My rule: <u>no publishing until every check passes</u>. Platform labels and clear sponsorship disclosures serve different roles; I review both against Instagram’s rules and U.S. FTC guidance.
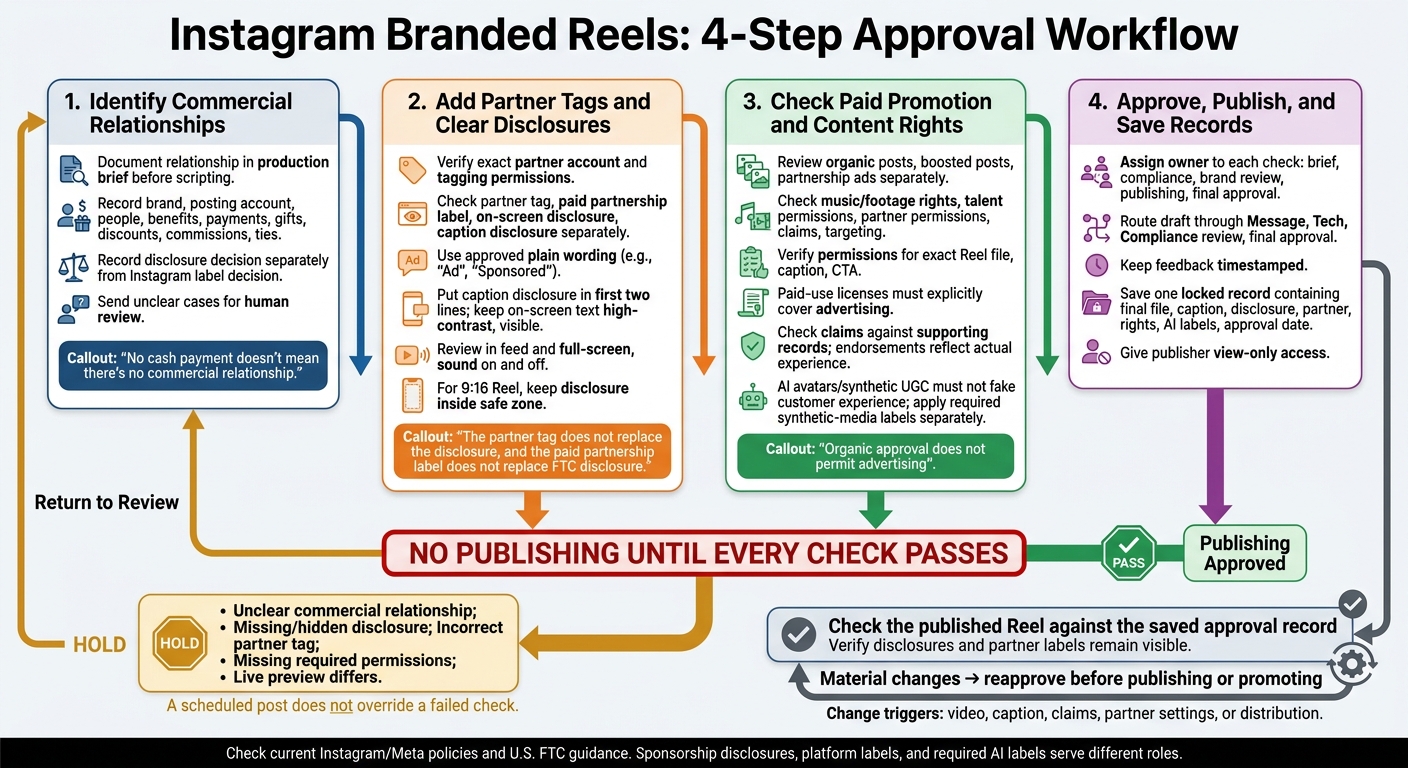
Instagram Branded Reels: 4-Step Approval Workflow
Step 1: Identify Commercial Relationships
Document the commercial relationship in the production brief before scripting. Include the brand, posting account, people appearing in the Reel, and any benefits received or promised. Record the disclosure decision separately from the Instagram label decision.
Send unclear cases for human review before production starts. This record determines which disclosure and label the Reel needs in Step 2.
Review Payments, Gifts, and Affiliate Commissions
Record any fee, gift, discount, or affiliate commission.
No cash payment doesn’t mean there’s no commercial relationship. A gifted item or the chance to earn a commission still needs review. Keep the creator’s relationship separate from paid promotion: an organic Reel may still need disclosure because of a commercial connection.
Review Employee, Founder, and Brand-Owned Posts
Identify whether anyone on camera is an employee or founder, and note whether the Reel will appear on a brand account. Assess the relationship from the viewer’s perspective - not what the team knows internally. Posts from brand accounts still need disclosure review, one post at a time.
When disclosure is needed, a tag or like isn’t a substitute. Record the required wording in the brief. Keep the brief pending until the relationship is documented and both the wording and Instagram label decision are approved. That decision guides the partner tag and disclosure check in the next step.
Step 2: Add Partner Tags and Clear Disclosures
Use the approved disclosure wording when adding the partner tag, paid partnership label, and on-screen notice. The partner tag does not replace the disclosure, and the paid partnership label does not replace FTC disclosure. After the label and disclosure are approved, check whether paid-promotion or content-rights rules also apply.
Verify the Partner Account and Paid Partnership Label
Before approval, confirm the exact brand account and any tagging permissions you need. In Instagram’s advanced settings, select the partner and turn on the paid partnership label. If tagging isn’t available, ask the brand to approve access before release. Keep the Reel on hold until approval comes through. Make sure the caption, spoken disclosure, and on-screen text match the approved draft.
| Item | Location | Owner |
|---|---|---|
| Partner tag | Reel header, next to username | Creator; brand approves access |
| Paid partnership label | Top of the Reel | Creator |
| On-screen disclosure | Inside the video’s safe zones | Video editor |
| Caption disclosure | First two lines of the caption | Copywriter/strategist |
Check each element separately during approval: the tag, label, on-screen disclosure, and caption disclosure. If the Reel will run as paid media, review promotion and rights next.
Place Disclosure Inside the Reel
Start with plain wording, such as:
“Ad” or “Sponsored”
Use high-contrast on-screen text and leave it visible long enough to read. If the endorsement is spoken, include an on-screen disclosure too. Don’t hide the disclosure behind “more,” put it in a bio, or rely on audio alone.
Check Mobile Visibility With Sound On and Off
Review the Reel in feed and full-screen, both with sound on and off. Check that cropping and platform UI don’t cover the disclosure. For a 9:16 Reel, keep it inside the visible safe zone. If it fails these visibility checks, revise it before the paid-promotion review.
Step 3: Check Paid Promotion and Content Rights
Once disclosure is approved, review organic posts, boosted posts, and partnership ads separately. Check Meta’s branded-content rules for organic posts and its ad policies for paid promotion. Verify partner permissions for the exact Reel file, caption, and CTA, not just the campaign. Keep content approval separate from distribution approval.
Compare Organic Posting and Paid Promotion Checks
Record which uses are approved. Organic approval does not permit advertising, and permission to tag a partner does not mean you can run a partnership ad.
Check the organic asset and paid versions against the rules for each use.
| Check | Organic branded Reel | Boosted posts or partnership ads |
|---|---|---|
| Disclosure | Use the disclosure approved in Step 2. | Confirm the paid version keeps the approved disclosure. |
| Music and footage | Verify rights cover organic publication. | Verify licenses explicitly cover advertising; organic music clearance may not apply. |
| Rights to use the talent’s likeness and performance | Confirm permission for organic use. | Confirm permission covers paid use. |
| Partner permissions | Verify the correct partner and tagging access. | Verify the permissions needed for the selected advertising method. |
| Claims and testimonials | Follow the evidence review below. | Recheck claims under ad policy. |
| Targeting | Confirm the post is suitable for organic distribution. | Confirm the intended audience matches the approved promotion. |
| Placements | Approve the organic Reel asset. | Review the exact video, caption, and CTA. |
Review every paid placement preview for cropped text, logos, or CTAs. Approval of the master file alone isn’t enough.
Verify Claims, Testimonials, and AI Content
Check claims and testimonials against supporting records. Endorsers must describe their actual experience. Hold unsupported claims for revision.
AI avatars and synthetic UGC must not fake customer experience or personal product use. Apply required synthetic-media labels separately from sponsorship disclosures - one does not replace the other.
Before publication, record the final render, including any revised voiceover, captions, or visuals, along with its rights status and approved labels.
Step 4: Approve, Publish, and Save Records
Follow the Approval Process From Brief to Publication
Once disclosure, rights, and paid-promotion checks pass, send the Reel for final approval. Assign one owner to each check: brief, compliance, brand review, publishing, and final approval.
Use the documented brief to route the draft through Message, Tech, and Compliance review, then final approval. Keep feedback timestamped rather than spread across email threads. If you use Sun Scroller, send AI-generated videos through the same brand and publication approval process.
Save Approval Records and Block Unapproved Posts
Save the approved version in one locked record. Include the final file, caption, disclosure wording, partner account, rights documentation, required AI-label settings, and approval date. Give the publisher view-only access.
Block publication and return the Reel to review if the commercial relationship is unclear, the disclosure is missing or hidden, the partner tag is incorrect, required permissions are missing, or the live preview differs from the approved file. A scheduled post does not override a failed check.
Check the Published Reel and Reapprove Changes
After publication, compare the live Reel with the saved approval record. Check that disclosures and partner labels remain visible.
Material changes to the video, caption, claims, partner settings, or distribution need another approval before the changed version is published or promoted.
Conclusion: Final Reels Approval Checklist
- Confirm the commercial disclosure. Make sure the Reel discloses the commercial relationship, tags the partner, and uses the paid partnership label.
- Review it on a phone. Check that text and disclosures stay within safe zones and remain visible beneath the platform’s interface.
- Add required AI labels. Apply the required labels for AI-generated or synthetic media. Before publishing, check the current Instagram Creator/Business policies and the FTC’s Disclosures 101 for Social Media Influencers.
FAQs
Must I disclose a gift if the brand didn’t request a Reel?
The provided search results don’t say whether you must disclose an unsolicited gift. Check Instagram’s official branded content policies or seek legal guidance to understand your disclosure duties when posting about products you received without a request from the brand.
Can I boost an older Reel after updating its permissions?
The search results provided don’t confirm whether updating an older Instagram Reel’s permissions lets you boost it.
How long should I keep Reel approval records?
Compliance retention periods may vary based on your internal policies. Keep approval logs and performance notes available for review after each month’s posts go live. Use those records to spot top-performing content and improve the design, graphics, and audio in your next batch of videos.