
TikTok vs Reels: Before-and-After Format Rules
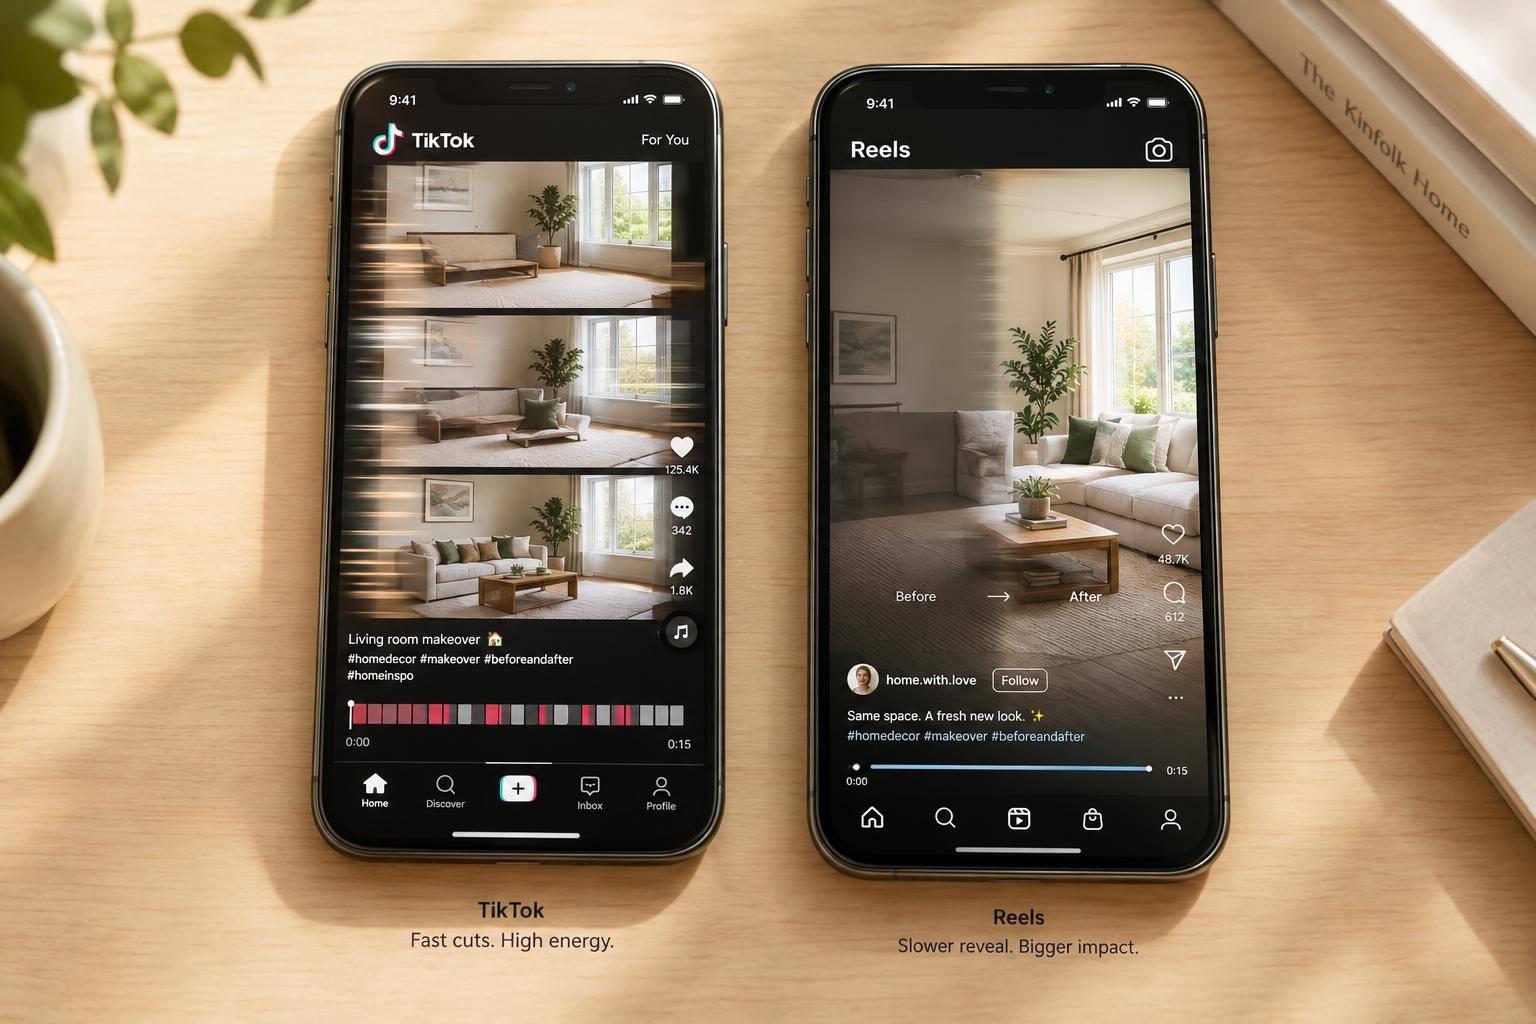
TikTok vs Reels: Before-and-After Format Rules
I’d start with one 30-second vertical video, then test two edits - not two different claims. For TikTok, try a reveal at 7–9 seconds; for Reels, try 12–15 seconds with more context. These are test ranges, not platform rules.
Here’s what I’d keep in the plan:
- Pacing and proof: Change cuts and pauses, but keep matching before-and-after footage, elapsed time, and result conditions.
- Text, audio, and trends: Keep the result visible, explain the change, and check music rights for each platform and use.
- Comments and safety: Answer from verified product information, disclose paid relationships and synthetic visuals when required, and keep legitimate criticism for review.
- Production and measurement: Approve each export, preview app controls, and test one variable at a time. Compare retention within each platform - not raw views across them.
Quick Comparison
| Test area | TikTok | Instagram Reels |
|---|---|---|
| Hook | Visual in 1–2 seconds | Statement plus visual within 3 seconds |
| Reveal | Try 7–9 seconds | Try 12–15 seconds |
| Text and captions | Short labels; result-led caption | More context; clear overlays |
| Audio and trends | Check fit and usage rights | Check fit and usage rights separately |
| Replies | Test fast replies or reply videos | Test saved replies or follow-up Reels |
| Approval and tracking | Review each export; track retention | Review each export; track retention |
My rule: <u>change the presentation, not what the result promises.</u>
TikTok vs Reels: Pacing and Reveal Timing
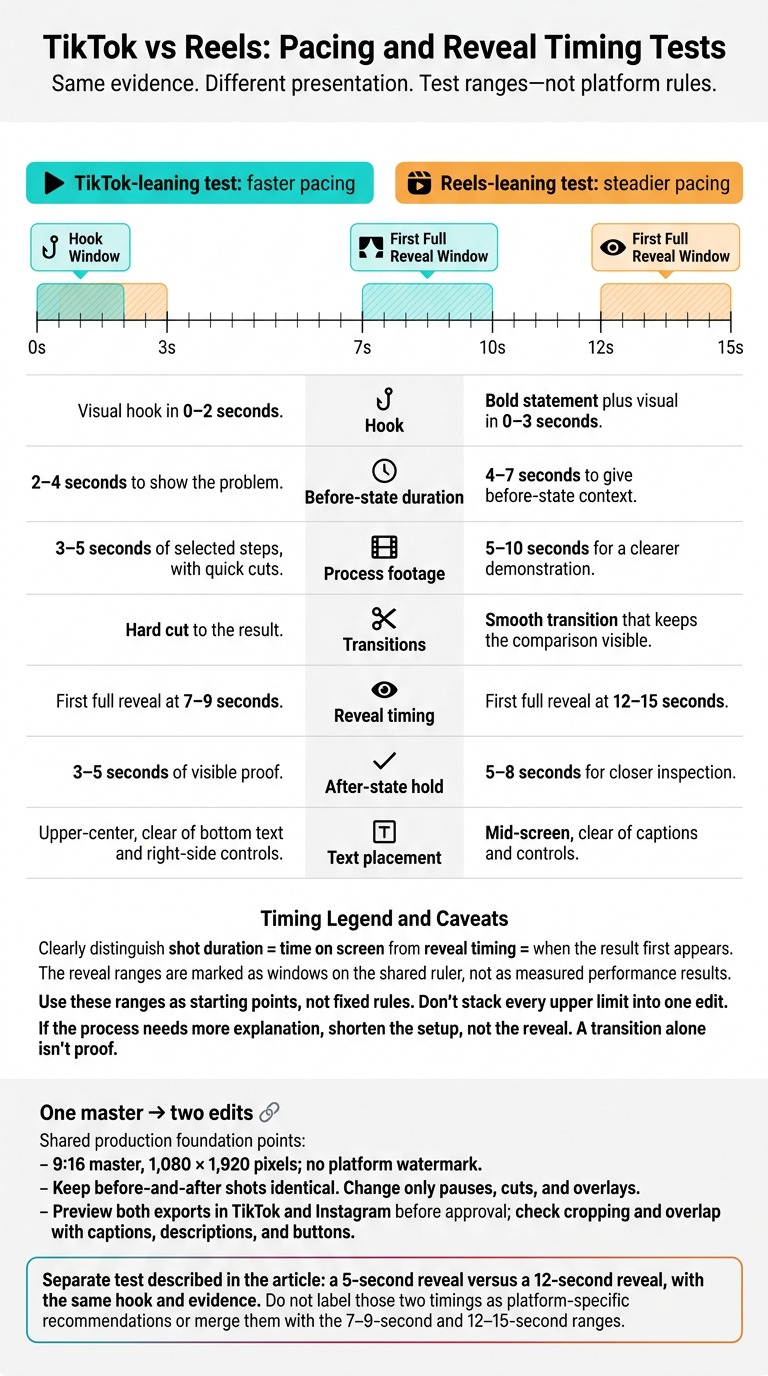
TikTok vs Reels: Pacing and Reveal Timing Tests
Build your TikTok and Reels edits from the same master, then adjust the pacing and reveal timing for each platform. Start with a visual hook in the first 1–2 seconds, and show the before state before revealing the result. The timings below are test ranges: shot duration means time on screen, while reveal timing means when the result first appears.
| Element | TikTok-leaning test: faster pacing | Reels-leaning test: steadier pacing |
|---|---|---|
| Hook | Visual hook in 0–2 seconds. | Bold statement plus visual in 0–3 seconds. |
| Before-state duration | 2–4 seconds to show the problem. | 4–7 seconds to give before-state context. |
| Process footage | 3–5 seconds of selected steps, with quick cuts. | 5–10 seconds for a clearer demonstration. |
| Transitions | Hard cut to the result. | Smooth transition that keeps the comparison visible. |
| Reveal timing | First full reveal at 7–9 seconds. | First full reveal at 12–15 seconds. |
| After-state hold | 3–5 seconds of visible proof. | 5–8 seconds for closer inspection. |
| Text placement | Upper-center, clear of bottom text and right-side controls. | Mid-screen, clear of captions and controls. |
Use these ranges as starting points, not fixed rules. Don’t stack every upper limit into one edit. If the process needs more explanation, shorten the setup, not the reveal. A transition alone isn’t proof.
Once you’ve set the timing test, use one master to make both platform versions.
Make 2 Edits From 1 Vertical Master
Create one clean 9:16 master at 1,080 × 1,920 pixels, without a platform watermark. Keep the before-and-after shots identical. Change only the pauses, cuts, and overlays.
Export two timing tests: a 5-second reveal and a 12-second reveal, with the same hook and evidence. Preview both exports in TikTok and Instagram before approval. Check for cropping issues and overlap with captions, descriptions, and buttons.
TikTok vs Reels: Trends, Audio, and Text
Once pacing and reveal timing are set, focus on text, audio, and trends. Overlays help viewers check the result, captions add context, and trends should make the transformation easier to understand.
Use the same evidence on both platforms. Adjust only the text, audio, and trend layer.
| Element | TikTok approach | Instagram Reels approach |
|---|---|---|
| On-screen text | Use short labels stating the timeframe and result conditions. | Use clean, brand-aligned overlays stating the timeframe and result conditions. |
| Post captions | Lead with the result and search terms. | Lead with useful context for the result. |
On both platforms, use captions to support the evidence with process details, materials, instructions, and limits. Test short versus detailed captions and light versus dense overlays. Text density isn't a fixed platform rule. Keep text clear of app controls, and leave the result visible.
Use Trends That Explain the Change
Use a sound, effect, or template only if it helps viewers understand what changed and how the product contributed. Skip effects that hide the process or make the result harder to verify. Watch the edit with the sound off - the transformation should still be clear.
Check audio rights for each platform, account type, and use, including paid ads. Access to an audio library doesn't grant ad rights or permission to reuse that audio on another platform.
Show Timeframes and Result Conditions in the Video
State the actual elapsed time and show the key result conditions beside the claim, at the same moment as the proof. When testing text density, keep those facts in place and change only the supporting detail.
TikTok vs Reels: Comments and Brand Safety
Test reply formats on each platform. Don’t assume TikTok and Reels audiences behave the same way. Apply the same evidence and disclosure standards to both. Measure pricing prompts by qualified inquiries and reduced confusion - not comment volume. Replies should explain the proof, not stretch the claim.
Try fast replies on TikTok and saved replies or follow-up posts on Reels.
Prompt to test TikTok follow-up test Reels follow-up test Purpose “Comment ‘INFO’ for pricing” Automated DM with cost breakdown Saved reply with cost breakdown Qualified inquiries; clear total costs “How long did this take?” Reply with the exact elapsed time and conditions shown in the video Follow-up Reel with the same details Verify duration without suggesting typical results “Is this AI-generated?” Reply identifying the synthetic parts Follow-up Reel disclosing synthetic parts Separate generated visuals from real evidence “Does this work for [X]?” Approved general-information reply Approved reply or explanatory Reel Explain verified uses without diagnoses or safety promises “Show us the ‘Before’ again” Side-by-side proof video Side-by-side proof Reel Check matching filming conditions
Once you’ve chosen your reply formats, make sure the footage supports a fair comparison.
Match Before-and-After Filming Conditions
Use the same camera position, lighting, distance, and framing in both shots. Disclose meaningful changes, elapsed time, and any conditions that affect the comparison. One result isn’t a typical or guaranteed outcome.
Before boosting either edit, check organic-content and advertising policies separately. Pay particular attention to beauty, fitness, health, and financial claims.
Disclose Paid and AI-Generated Content
Clearly disclose paid brand relationships and synthetic or materially altered content when required so viewers aren’t misled. Use the applicable platform labels.
An AI-generated transformation isn’t proof of an actual customer result. A synthetic testimonial must not suggest that it reflects a genuine customer experience. Have a human approve the visuals and disclosures before publishing, and apply the same approval standard to public replies and follow-up posts.
Set Response and Moderation Rules
Prepare approved replies for pricing, safety, guarantees, and sensitive questions. Fast TikTok replies, saved Instagram replies, and follow-up Reels must stay within verified product information. Don’t offer individual diagnoses or unsupported promises.
Use a written moderation policy to remove spam and abuse while keeping legitimate criticism for review. Escalate missing evidence or misleading claims, then publish a correction or proof follow-up.
Production Workflow: Approval, Publishing, and Measurement
Once the edit is set, lock the claim, approve each version, and test one variable at a time.
Verify the Claim Before Editing
Put the before-and-after claim, the proof you can support, and any timing or conditions into one approved script. Link every claim to its supporting evidence, and use that same script for both cuts.
Review the TikTok and Reels exports side by side. The pacing can differ, but both must communicate the same result, timing, and conditions. Check facts and disclosures before scheduling, and approve each final export - not just the master - before publishing.
Monthly Production With Sun Scroller
Sun Scroller can handle monthly short-form production, scheduling, and analytics. The brief still needs verified proof, approved claim wording, and a separate review for each platform.
Test Hooks and Reveals Separately
After approval, change only one variable per test. Start with the opening 3 seconds, keeping the proof footage, reveal timing, and CTA fixed. Test reveal timing in a separate round. Keep the claim and qualifying information unchanged throughout, and test multiple posts before choosing a winner.
Track retention at both the opening and the reveal. Compare edits of similar length within TikTok and within Reels, using the same reporting window. Don't compare raw views across platforms. Use the strongest hook and reveal in the next brief.
Conclusion: Keep the Evidence Consistent and Test Each Edit
Change the edit, not the proof: give TikTok faster hooks and earlier reveals. Give Reels more context and keep the proof on screen longer. Keep the footage, timeframe, and result conditions identical across both edits.
Pick trends, audio, text, and comment replies for each platform separately. Every version should point back to the same approved evidence.
Before publishing, check the full workflow: verify the claim, create both edits, preview pacing and safe zones, and approve disclosures and music rights. Then publish and measure results against the business goal.
FAQs
How do I choose reveal timing for a complex transformation?
For a complex transformation, lead with an immediate emotional payoff. Viewers decide whether to keep watching within the first two seconds, so start with an unexpected visual before moving into the transformation. Show the product in action or reveal the result early to keep the pace moving. Let visual proof do the work instead of lengthy explanations - it builds trust and keeps viewers watching.
What if my before-and-after footage has different lighting?
Sun Scroller uses AI to generate and refine your video content, helping fix uneven lighting without perfect raw footage, manual editing, or complex color correction.
If the result doesn’t meet your standards, you can request a redo. Your first revision on any video is always free, helping your before-and-after content look professional and consistent across platforms - without re-filming.
How many posts should I test before choosing an edit?
Don’t judge an edit after just one or two videos. Post consistently for at least 4 weeks. That gives the algorithm and your audience enough signal to show which formats and hooks are working.
After 4 weeks, check which formats and hooks brought in the most views. Then focus on what worked best.